TPLINKWIFI.NET
Tplinkwifi.net is the web-based admin console of the Tp Link router. To reach the web-based admin panel, you can also use the default IP http://192.168.0.1. Through these addresses, you can login to the router and configure its settings.
The web-based admin panel or web interface allows you to get inside your Tp Link wifi router. There’s one more way of accessing your router than the two mentioned above – Tp Link app. Tp Link routers also have a dedicated app with the name of “Tp-Link Tether”. Each router has a designated web-management page that does not require an internet connection as well.
WHAT IS TPLINKWIFI.NET ?
http://tplinkwifi.net is the local web address that helps you to manage Tp Link router services like WiFi security, parental controls, MAC filtration, admin password, port forwarding, etc. Apart from these, there are more services and features on your router that can be managed through the default web address.
Before you go to the tplinkwifi.net login page, it is important that you cross-check whether your device is connected to the network. Whatever device you’re using, be it a mobile, tablet, or PC, it needs to be connected to the Tp Link router’s network.
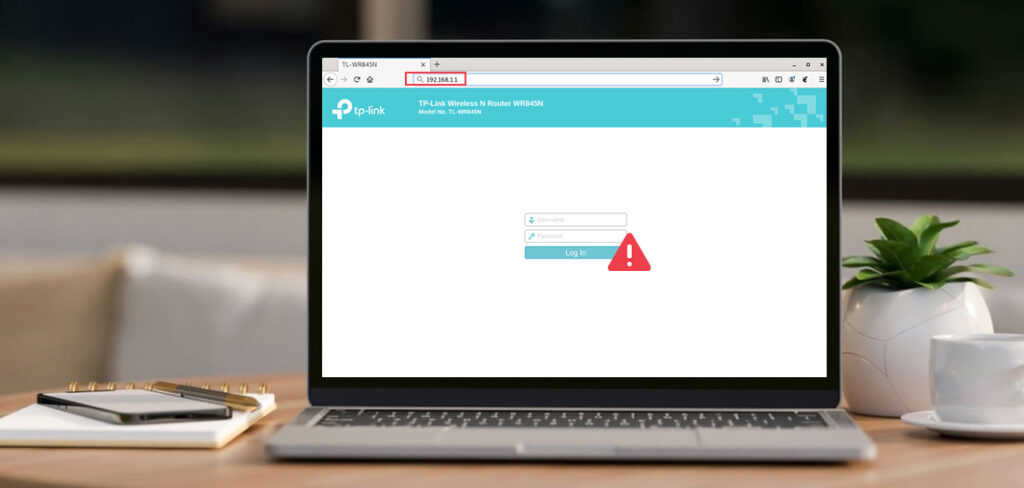
ACCESS TPLINKWIFI.NET LOGIN PAGE BY THE WEB ADDRESS
Want to learn how to access tpinkwifi.net login page by web address? It is very easy! Follow the steps below:
- Connect your device to the router’s network.
- After that, open a web browser on your device.
- Type http://tplinkwifi.net in the address bar and press Enter.
- The Tp Link wifi router login page will appears on the screen.
- Kindly put down the username and password of the router.
- Default username - admin
- Default password - admin or password
- Click on the Login button.
- At last, you will be logged into the Tp-Link wifi router’s admin panel
TPLINK ROUTER LOGIN BY IP ADDRESS
To login to the Tp-Link wifi router using the IP address, follow the steps below:
- The internal IP address of your router is http://192.168.1.1.
- Go to the web browser on a device connected to the Tp Link wifi.
- Type the default IP address of the router in the browser and hit Enter.
- You will see the Tp Link login page on the screen.
- Enter “admin” in the username and “admin” or “password” in the password.
- At last, you can login into the Tp Link wifi router.
TP LINK ROUTER LOGIN BY APP
The third method to login to the Tp-Link wifi router is through the Tp-Link Tether app. You can get the Tp-Link Tether app from the Google Play Store or the App Store. Follow the steps below to login through the app:
- Download and install the Tp-Link Tether app on your mobile.
- Open the app on your mobile.
- The Tp Link router login page will appear on the app screen.
- Enter the username and password of your router.
- Tap Login.
- Finally, you will login to the Tp-Link wifi router using the app.
HOW TO CHANGE TPLINKWIFI SSID NETWORK NAME?
SSID is the network name of your Tp Link wifi router. In simple words, your network is known by its SSID. So whenever you search for your home network on any device, it’s SSID will appear on the list. To change the SSID or network name of your tplinkwifi net, you need to login to the device. Follow the steps below:
- Firstly, go to the web browser on a device connected to the Tp-Link router.
- Thereafter, type tplinkwifi.net or tplinklogin.net in the URL bar.
- Press Enter and you will see the Tp-Link router login page.
- Put down your router’s username and password as “admin” and “admin” respectively.
- The Tp Link router web management page will appear on the screen.
- Go to Settings and then select Wireless Settings.
- After that, scroll down to see SSID.
- Click on the SSID bar and press Backspace on your keyboard to clear the previous name.
- Now enter the new network name or SSID for your WiFi.
- After that, click Save and the Tp Link router will reboot.
NOTE – All your devices will be disconnected from the network. You may need to reconnect to the Tp-Link WiFi.
HOW TO CHANGE TPLINKWIFI ROUTER PASSWORD AND USERNAME?
To change tplinkwifi router password and username, you need to go to the Access Control page of your router. The page can be access when you login to the Tp-Link WiFi router’s web-based admin panel. Ensure that your computer is connected to the Tp-Link WiFi.
- After that, launch a web browser and enter the private IP http://192.168.1.1.
- The browser will redirect you to the Tp Link WiFi login page.
- Enter “admin” as the username and then enter “admin” as the password.
- “Admin” is the default username and password.
- The web browser will navigate you to the web-based admin panel.
- Click Management and then select Access Control.
- Select Password and then you will have to enter an old and new password.
- Firstly, enter the old admin password of tplinkwifi.net and then enter the new password.
- Click Save and the new settings will apply to the Tp Link router admin panel.
NOTE – Now you will have to use the new password and username to login to the tplinkwifi.net setup page or login page. You can also take note of the new password so you don’t forget it in the future.
TROUBLESHOOT THE TPLINKWIFI.NET
It is important to fix the tplinkwifi.net not working issue as soon as possible. If you delay fixing the issue, your router may show up with some additional problems. This will furthermore worsen the situation. Follow these steps to troubleshoot the tplinkwifi.net issues.
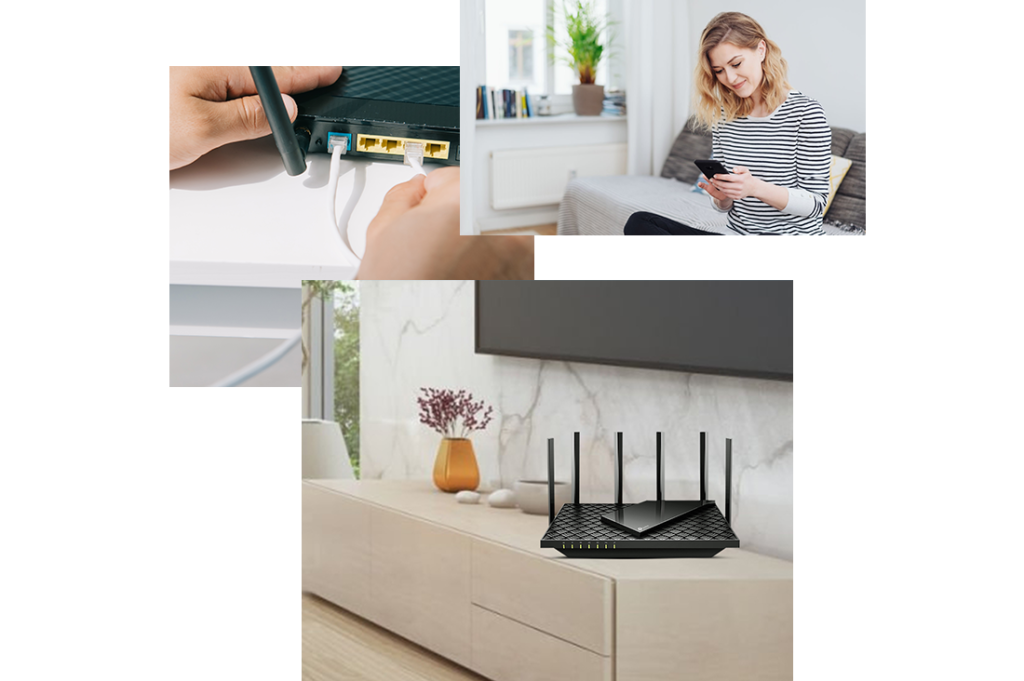
- First of all, check for the defective cables or power sockets that are being used by the router.
- Secondly, examine the connections and ports on your router.
- The power cable and ethernet cable should be firmly insert into the ports.
- After that, make sure there is no voltage drop-offs or power outage on the router.
- Please do not use any other router’s power cable.
- Thereafter, ensure that the firewall is not restrict the tplinkwifi.net login page.
- Clear the cache, cookies, etc from the browser’s browsing data.

- Now, enter the address tplinkwifi.net or internal IP http://192.168.1.1 in the address bar.
- Press Enter and check whether the issue persists or not.
- If the issue persists, use any other device to login to the Tp Link WiFi router.
- In case the issue exists on the new device as well, it’s time to reset it.
- Reset your Tp Link router to the factory default settings.
- Press and hold your Tp-Link WiFi router’s reset button for 10 seconds.
- Reconfigure the router once it resets and the issue will be fixed.
BASIC LOGIN ISSUE WITH TP LINK ROUTER LOGIN PAGE

Connectivity problems
- If you’re using an ethernet connection to access the web-based utility of your router, check that the connection is working correctly. If the current cables aren’t working, try different ports.
- Contact your local ISP if you face any issues with the internet connection.
Incorrect login information
- Check your tp-link login credentials carefully as they are case-sensitive.
- You can use a simpler network topology and connect only one end to the Tplink router. It would be best if you did not connect any other devices, such as the modem or server because they can slow down the performance and run of the web management server.

Incompatible web browser
- You can try different web browsers or end devices. If you’re using a single-end device, such as a computer or tablet, you can restart it and clear the cache.
- Deactivate the firewall and anti-virus software.
- Try the reset option at the end.
WHY IS TPLINKWIFI.NET NOT WORKING?
You may often find your router’s default address tplinkwifi.net not working. This is because of user errors and network errors. These errors are very common and can be fixed in no time. You just have to follow the troubleshooting steps in order to fix the issue. Prior to that, it is important that we learn the causes of the issue.
- PC or mobile not connected to Tp Link WiFi
- Wear and tear on the cables and wires
- Firewall restricting the tplinkwifi.net login page to load
- Incorrect web address entered in the browser
- Web address entered in the search bar
- Tplinkwifi showing errors because of an outdated browser
- Cache and cookies restricting tplinkwifi.net login page
- Firmware malfunction or fault
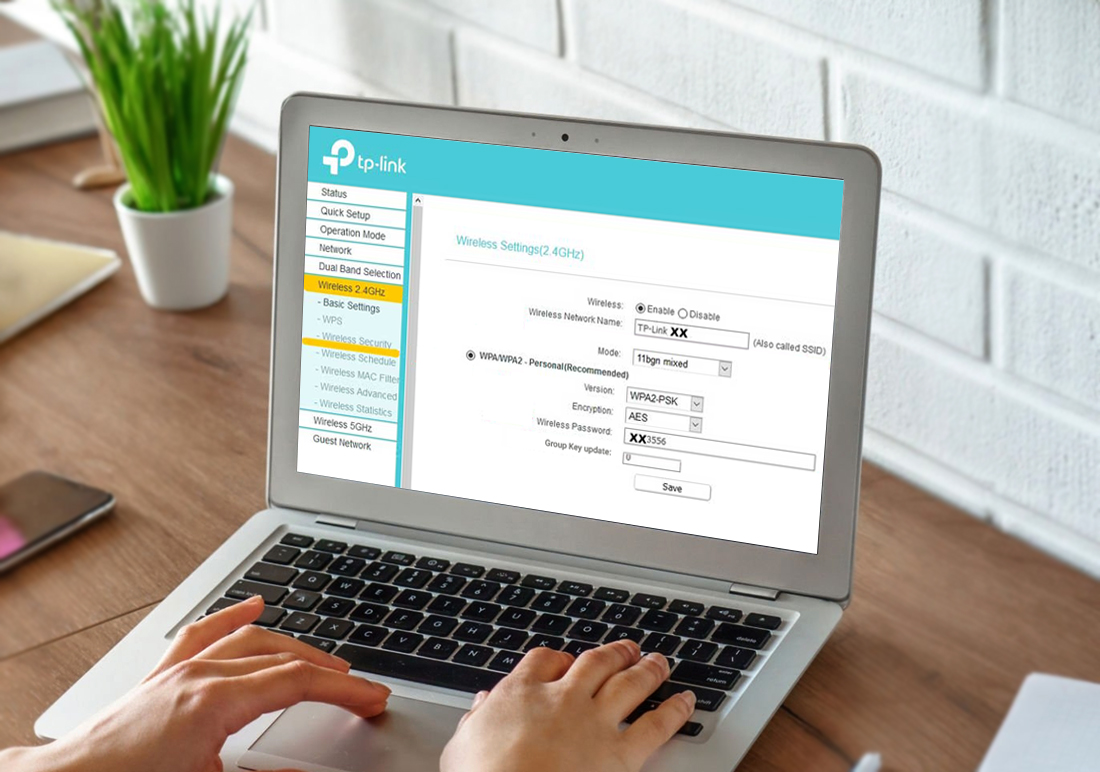
HOW DO I CHANGE THE BASIC WIRELESS SETTINGS ON THE TP-LINK ARCHER WIRELESS ROUTER?
- Firstly, perform the tplink login process and access the Tp Link router setup page by entering the default IP address and default gateway in the address bar.
- Select the Wireless option. Next, select Wireless Settings from the left menu to open the page.
- You can create a new name for your wireless network. You can leave the default TP Link_ ***** wireless number. Click the Save button to apply the changes.
- Next, select Wireless. It is recommended that WPZ/WPA2 personnel be used.
- To save your settings, make the changes you desire and click the Save button.
- To make sure that all settings are applied, go to System Tools. Click Reboot.
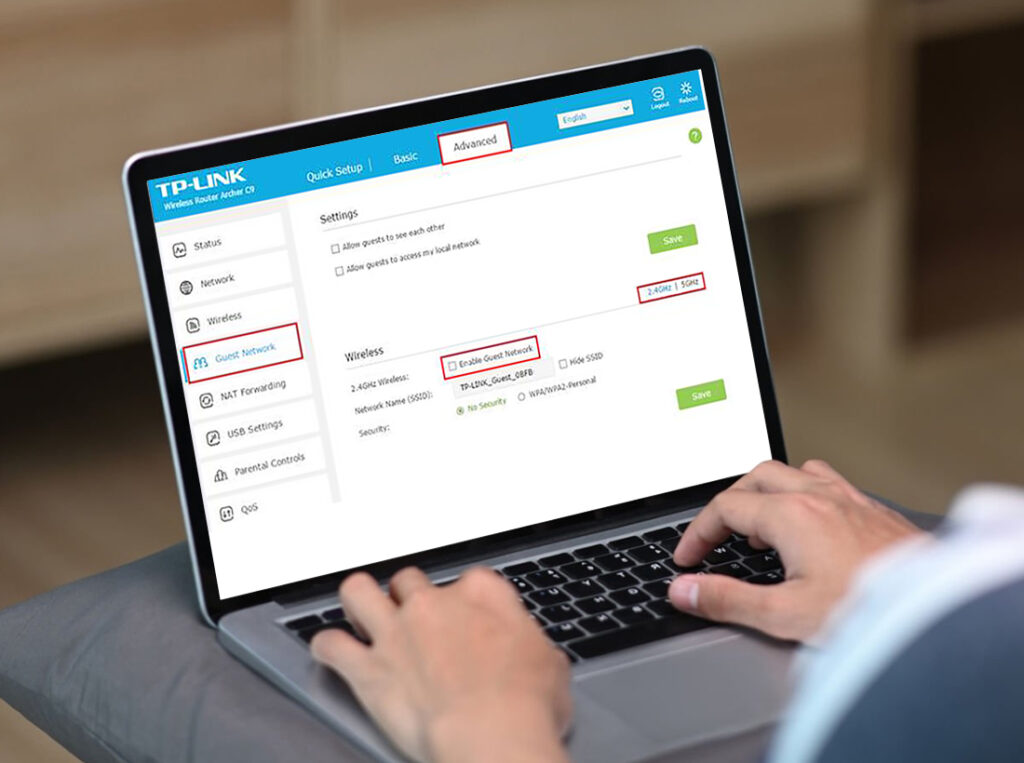
STEPS TO CREATE A GUEST NETWORK ON THE TP-LINK WI-FI ROUTERS?
- Firstly, perform the tplink login process to access the router’s web interface.
- Click on Guest Network, then go to Advanced settings. Find the Wireless section.
- As needed, create a guest network.
- Choose between 2.4GHz and 5GHz networks, then tick the Enable Guest Network box.
- You can customize the SSID. If you don’t want guests to input SSID manually for guest network access, don’t choose Hide SSID.
- Security to WPA/WPA2 personal: Keep the default Version and Encryption value and create your password.
- Select the Save option. Your guests will now be able to access your guest network using the SSID/password you have set.
HOW TO UPDATE THE FIRMWARE ON THE TP-LINK WI-FI ROUTERS?
- Download the most recent firmware version.
- Visit the TpLink website to find the download centre for your region. Next, select the drop-down for the TpLink product. Select the appropriate hardware version and click on firmware. This is the list of available firmware displays.
- Extract the firmware file from the .ZIP file.
- Log in to the TP-Link router’s management page.
- Click on System Tools Fireware Upgrade
- Click Browse/Choose File and then click Open to open the extracted firmware file.
- Choose the Upgrade button. The device will automatically reboot after the upgrade is complete.
- Click on status to check if your router’s firmware was updated.
- Some firmware updates can restore router settings to their original state. To reconfigure your TP-Link router, use the Quick setup wizard.
UPDATING TP LINK WIFI FIRMWARE
Having an updated firmware file download and install on your router is key to having stable internet speeds. This is not only important for speed but also in terms of information security. If you wish to protect your data from being leaked online, making the latest firmware update is important. If you feel your TP-Link router is not performing up to the mark, here are some steps you should follow:
Visit the TP-Link website and download the latest firmware file according to the router model. You can do that by visiting the download center, making the appropriate selection from the drop-down and selecting the correct hardware version. Now, click on the Firmware button and a list of available firmware updates will be displayed
- You’ll need to extract the firmware from the downloaded ZIP file.
- Log in to the tp link quick setup wizard online.
- Go to the System Tools menu and click on the Firmware Upgrade option.
- Click on the Browse/ Choose File option to find the extracted firmware file and click on the Open button.
- Once the file is uploaded, click on the Upgrade button. The device will reboot automatically after the upgrade is finished.
- Click on the Status button to check if the firmware version is updated.
Note: When you update the firmware, the router may RESET itself. You will just need to follow the setup process again using the tp link quick setup wizard.

TP-LINK ROUTER RESET PROCESS
When you are facing issues related to the setup, or login or maybe the router login page, or the hardware itself, the first resort is always to restart the devices. However, even after following a whole process of troubleshooting, issues do not go away, the last resort is to perform device RESET. Now, there are more than one ways to reset a router- Hard RESET and RESET using the web interface. We’ll discuss both of them here:

PERFORMING THE HARD RESET
As the name suggests, Hard RESET means reset the device using the button present on the rear panel. When you are ready to perform the same, follow the steps:Locate the RESET button on the rear panel and use a thin object to press and hold the same.
- Press the button for about 10 seconds until the LEDs on the front panel start to flash low.
- Release the RESET button and wait for the router to reboot itself to factory default settings.
- Follow the setup process again using the tp link quick setup wizard.

RESET USING THE WEB INTERFACE
- You will need access to the tplinklogin setup wizard. To login, enter the default IP address 192.168.1.1 in the address bar of the browser window.
- Type in the username and the password details and this will log you in to the admin panel.
- Go to the Advanced menu and click on System Tools. Now, click on Backup & Restore and then on the Factory Default Restore page, click on the Factory Restore button.
- Wait for the router to reboot itself to factory default settings.
- Follow the setup process again using the tp link quick setup wizard.
FREQUENTLY ASKED QUESTIONS
- Firstly, download the latest firmware for your router.
- Go to the Tp Link firmware’s website and enter your router’s model number.
- Download the suitable file for your device.
- After that, login to the router using http://tplinkwifi.net.
- Put down the username and password on the login page.
- Go to the web-based management page.
- Select System Tools and then click Firmware Upgrade.
- Follow the on-screen instructions to finalize the firmware update on your router.
In case you notice your Tp Link router is connected but not internet access is there, the problem may be with the modem or in fact your router itself. Firstly, we should reboot the modem and the router. After that, make sure the cables are not torn or defective. Call your internet service provider to cross-check whether the issue is at their end. If the modem shows an active internet status, the problem lies with your router. Reset your Tp Link router and reconfigure it to access the internet once again. If you don’t know about the configuration, kindly reach out to our support team.
It is important that you always keep your device up-to-date. That way, your router will stay stable and compatible with all the devices, features, and settings. If you don’t update your router on a regular basis, it is sure to come across multiple issues in its functionality.
If you are unable to set up your Tp Link router, you need to fix the glitch on your device as soon as possible. Try to reboot your router and then re-attempt to set it up. If the issue does not go off, use any other device to login to the router and configure the settings. In case the issue persists, you need to reset your device and then retry to set it up.